


Consultations are the core of EazyClinic. A consultation represents a single patient visit and carries everything about it: vitals, clinical notes, prescriptions, services, generated documents, and the final bill. This guide follows a visit from the moment a patient arrives to the moment they pay and leave.
The consultation lifecycle
Every consultation moves through four stages. The current stage is always shown as a coloured tag.
| Stage | What it means |
|---|---|
| Pre-consultation | The patient has checked in and is waiting to be seen. |
| In-Consultation | The consultant is with the patient — recording notes, vitals, prescriptions, and services. |
| Awaiting Medicine | The clinical part is done; the visit is ready for dispensing and checkout. |
| Completed | The visit is finished and the bill is settled. |
You can always re-open a completed consultation if you need to make a change.
Starting a consultation
From the Consultations list, click New Consultation.
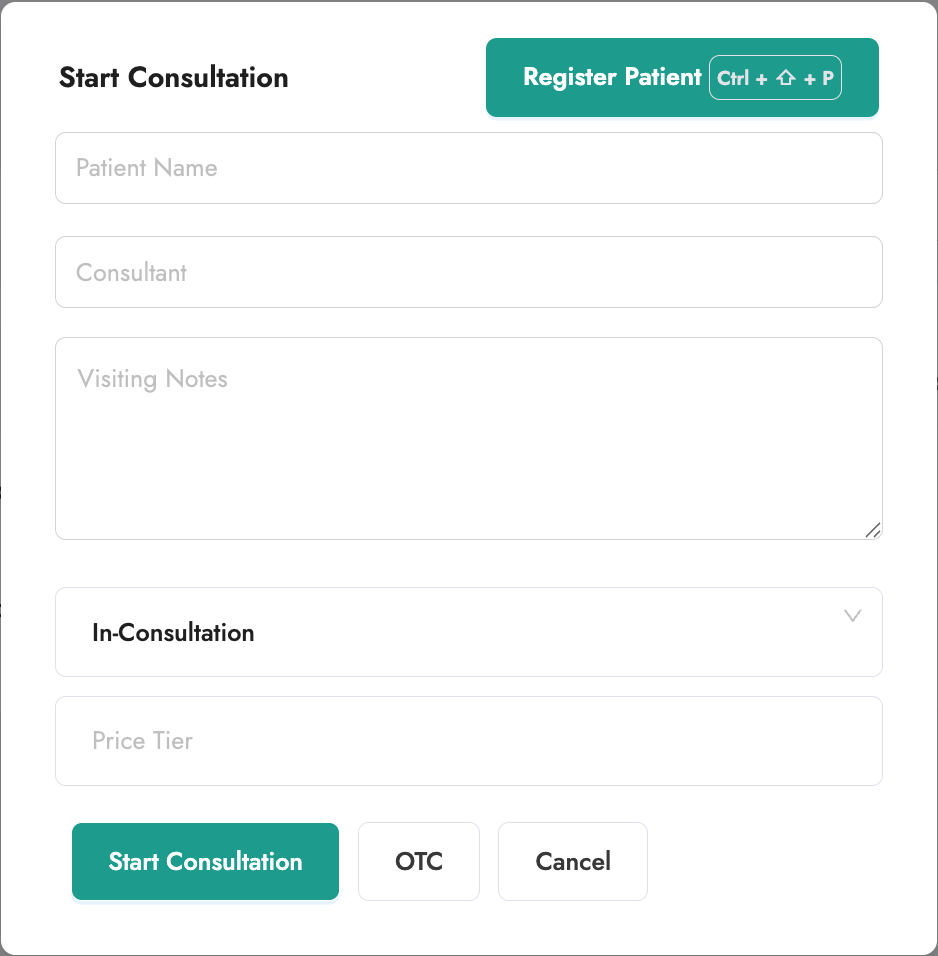
- Find the patient. Start typing the patient's name (or ID) in the search box. Select them from the results.
- If they're not registered yet, click Register Patient (shortcut:
Ctrl/Cmd + Shift + P) to add them without leaving the screen. See the Patients guide for the full registration form, including scanning an IC or passport.
- If they're not registered yet, click Register Patient (shortcut:
- Choose the consultant who will see the patient.
- Confirm the price tier. EazyClinic automatically fills in the price tier from the patient's most recent visit. You can change it if this visit should be billed differently (for example, a different insurance panel).
- Click Create.
The patient is now in Pre-consultation and is automatically added to the Queue as Waiting. See the Queue guide.
Over-the-counter (OTC) sales
For a quick sale that doesn't need a full visit (for example, selling a medication over the counter), use Over the Counter when creating the consultation. EazyClinic creates a completed consultation and takes you straight to checkout to collect payment.
Managing the waiting patient
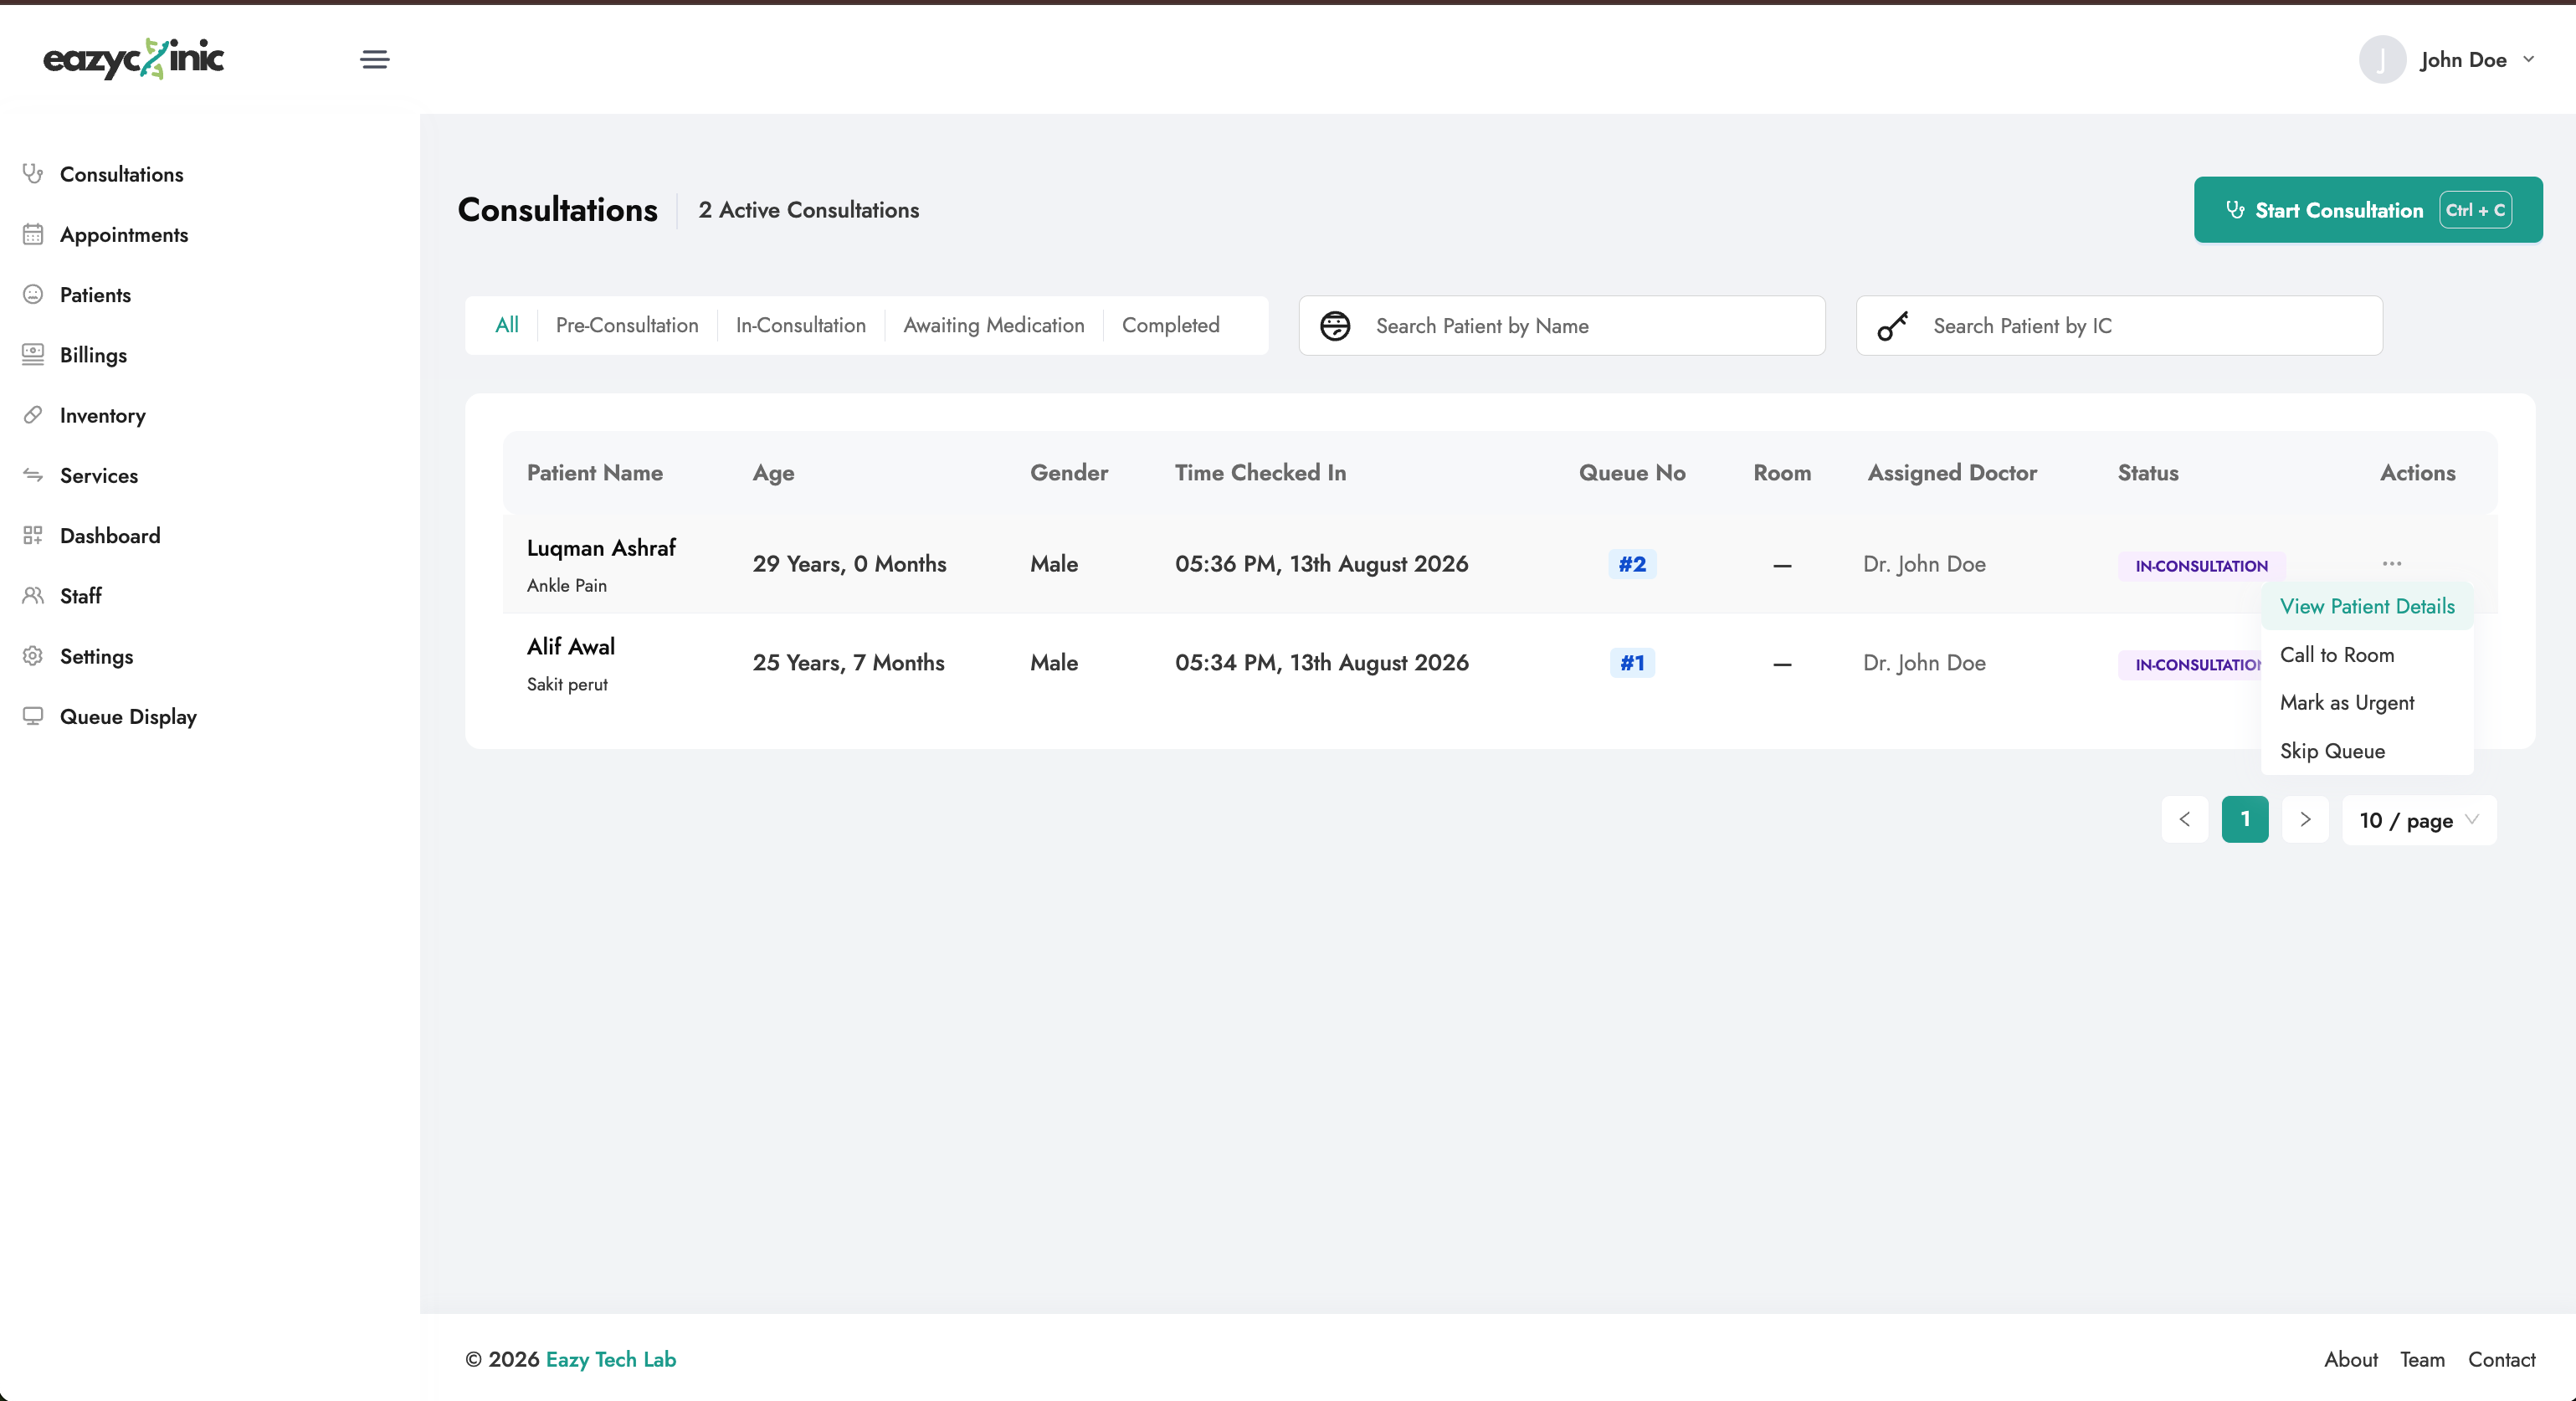
On the Consultations list, open the actions menu (the ⋯ button) next to a waiting patient. Depending on the stage, you can:
- View Patient Details — open the full patient record.
- Call to Room — assign the patient to a room. This updates the Queue Display so the patient knows where to go.
- Mark as Urgent / Remove Urgency — bump a patient's priority in the queue.
- Skip Queue — move a patient out of the active queue.
- Start Consultation — begin the visit (moves it to In-Consultation).
During the consultation
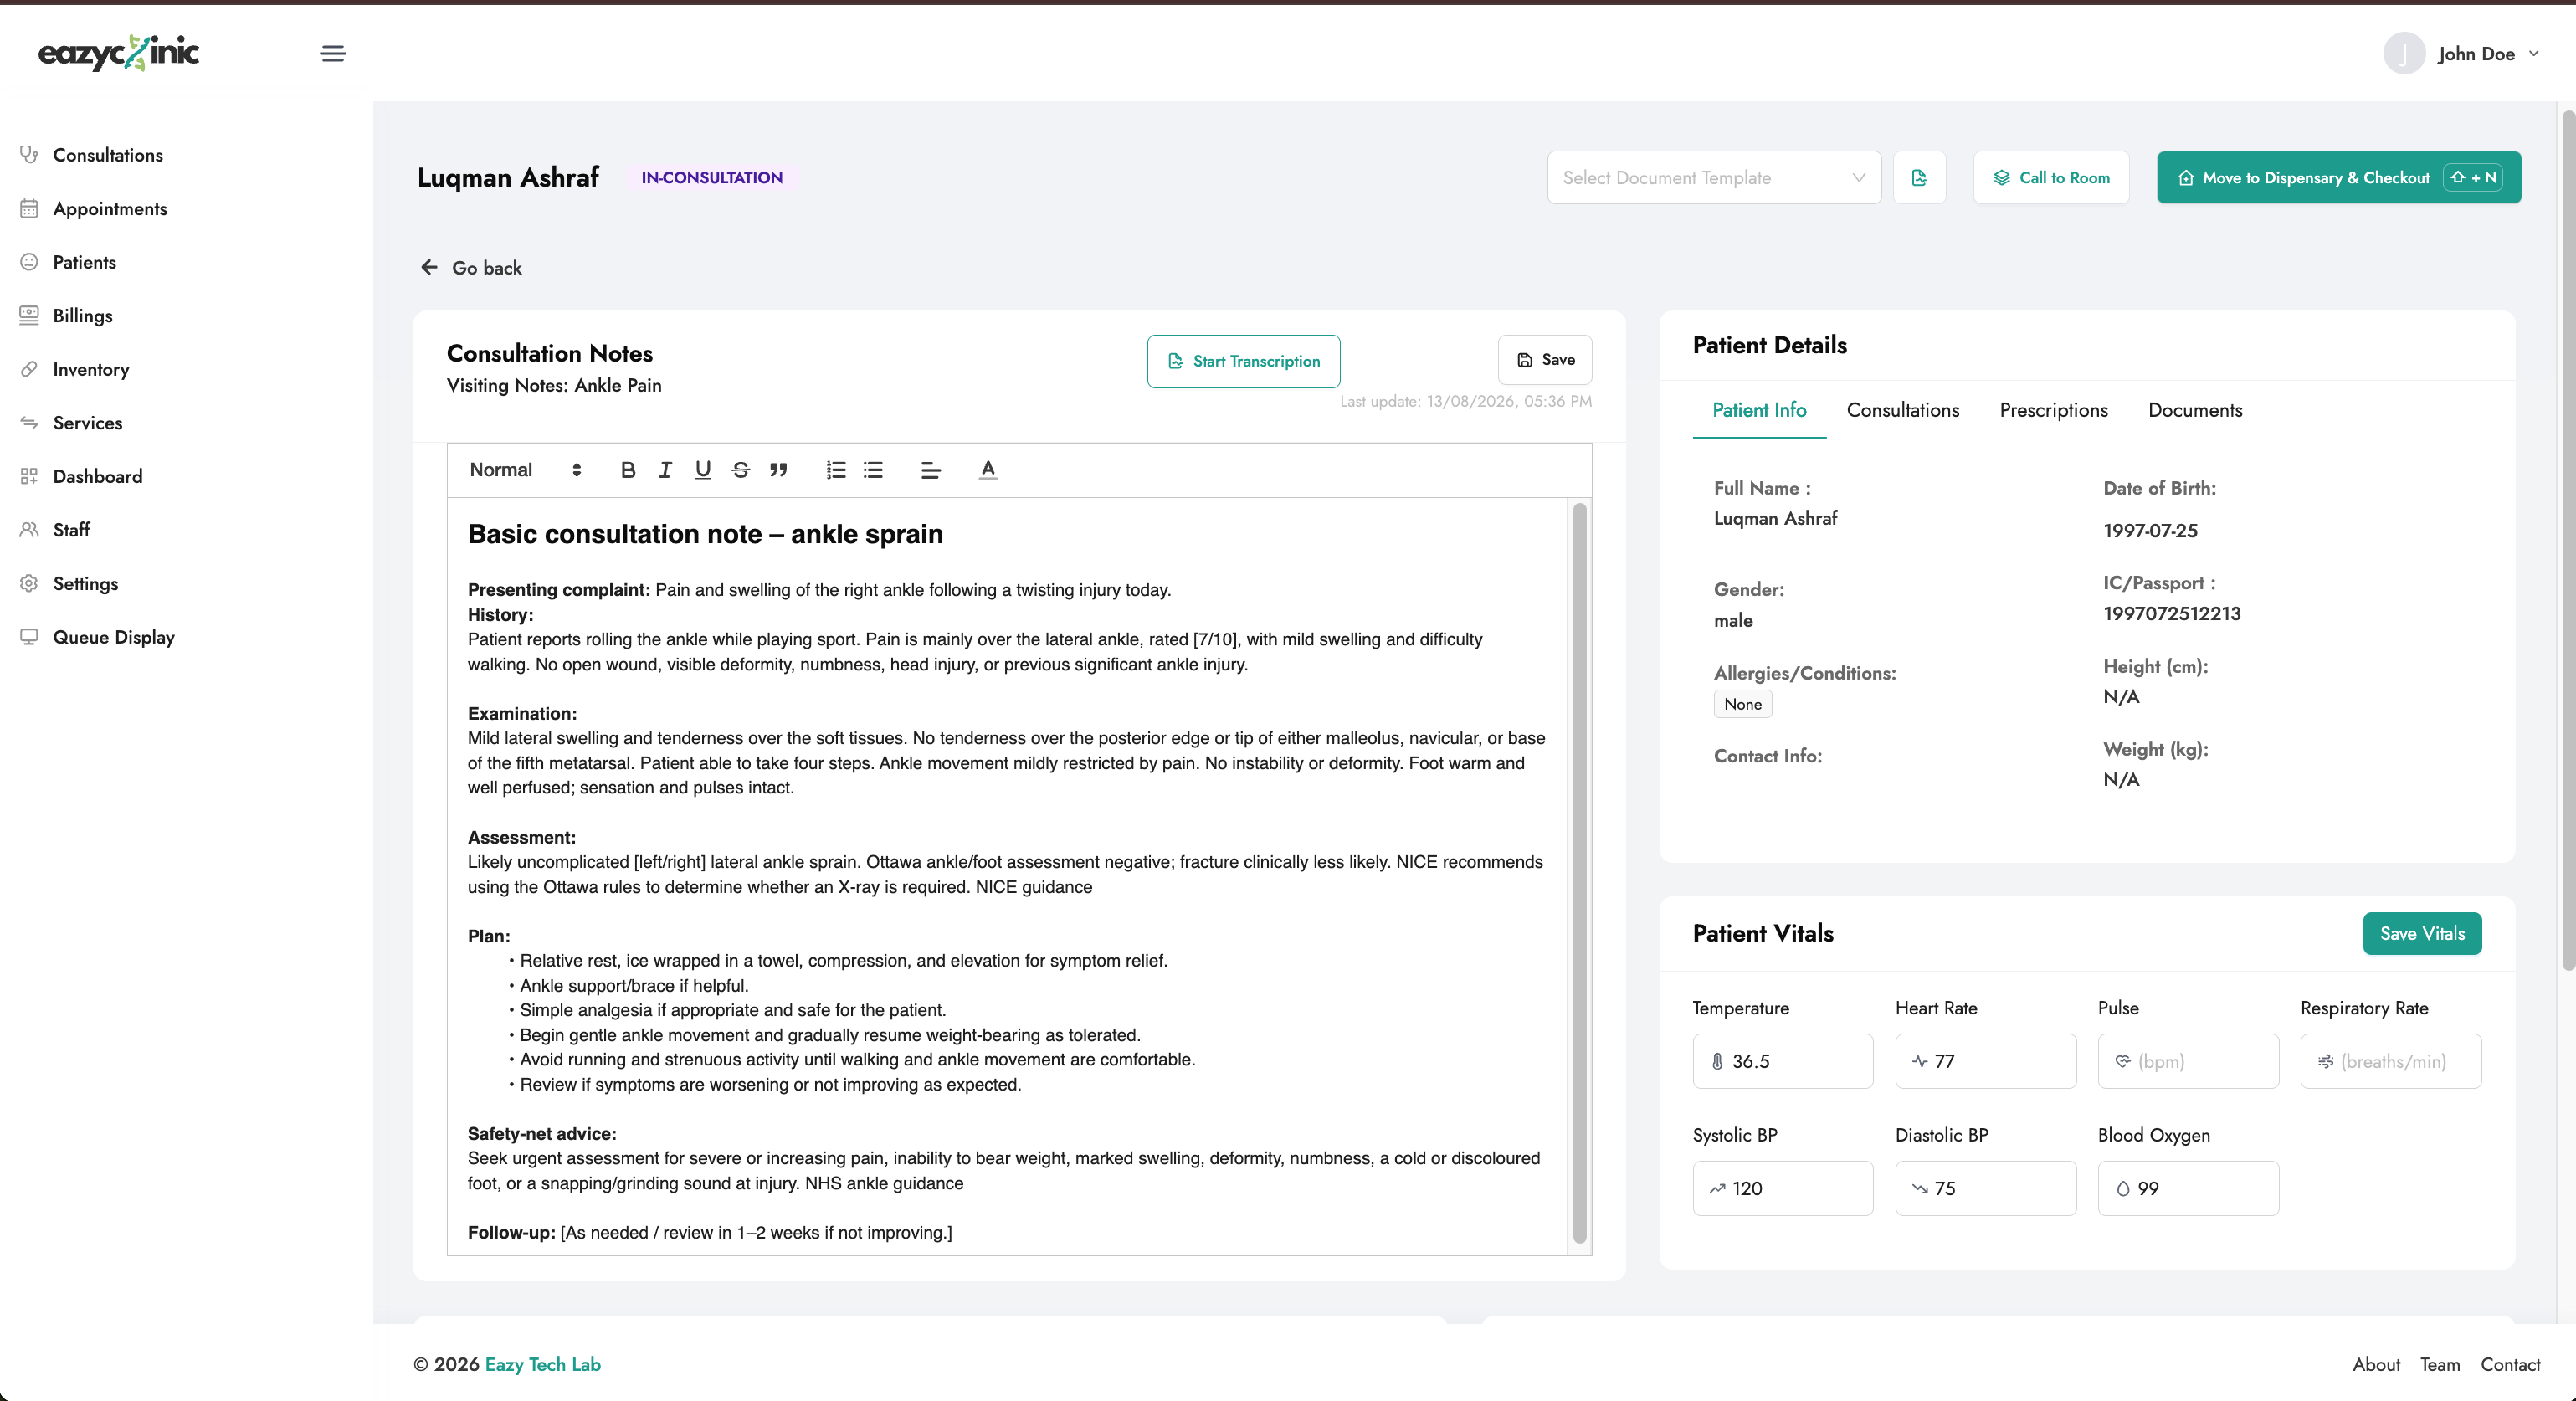
Open the consultation to see the full workspace. While the visit is In-Consultation, you can:
Record vitals
Fill in the Patient Vitals panel — temperature, heart rate, pulse, respiratory rate, systolic and diastolic blood pressure, and blood oxygen — then click Save Vitals. Vitals can be edited while the visit is in Pre-consultation or In-Consultation.
Write consultation notes
Use the rich-text notes editor to record your clinical findings. Click Save to store them.
Voice-to-text: you can dictate instead of typing. Start recording with the microphone button, speak your notes, and stop recording — EazyClinic transcribes the audio and adds it to the notes automatically.
Add prescriptions
In the Prescriptions table, add the medications you're prescribing. Items are drawn from your Inventory, so dosage, frequency, and instructions can be pre-filled and adjusted per patient.
Add services
In the Services table, add any services performed during the visit (for example, a procedure or a test). Services and their prices come from your Services list.
Documents
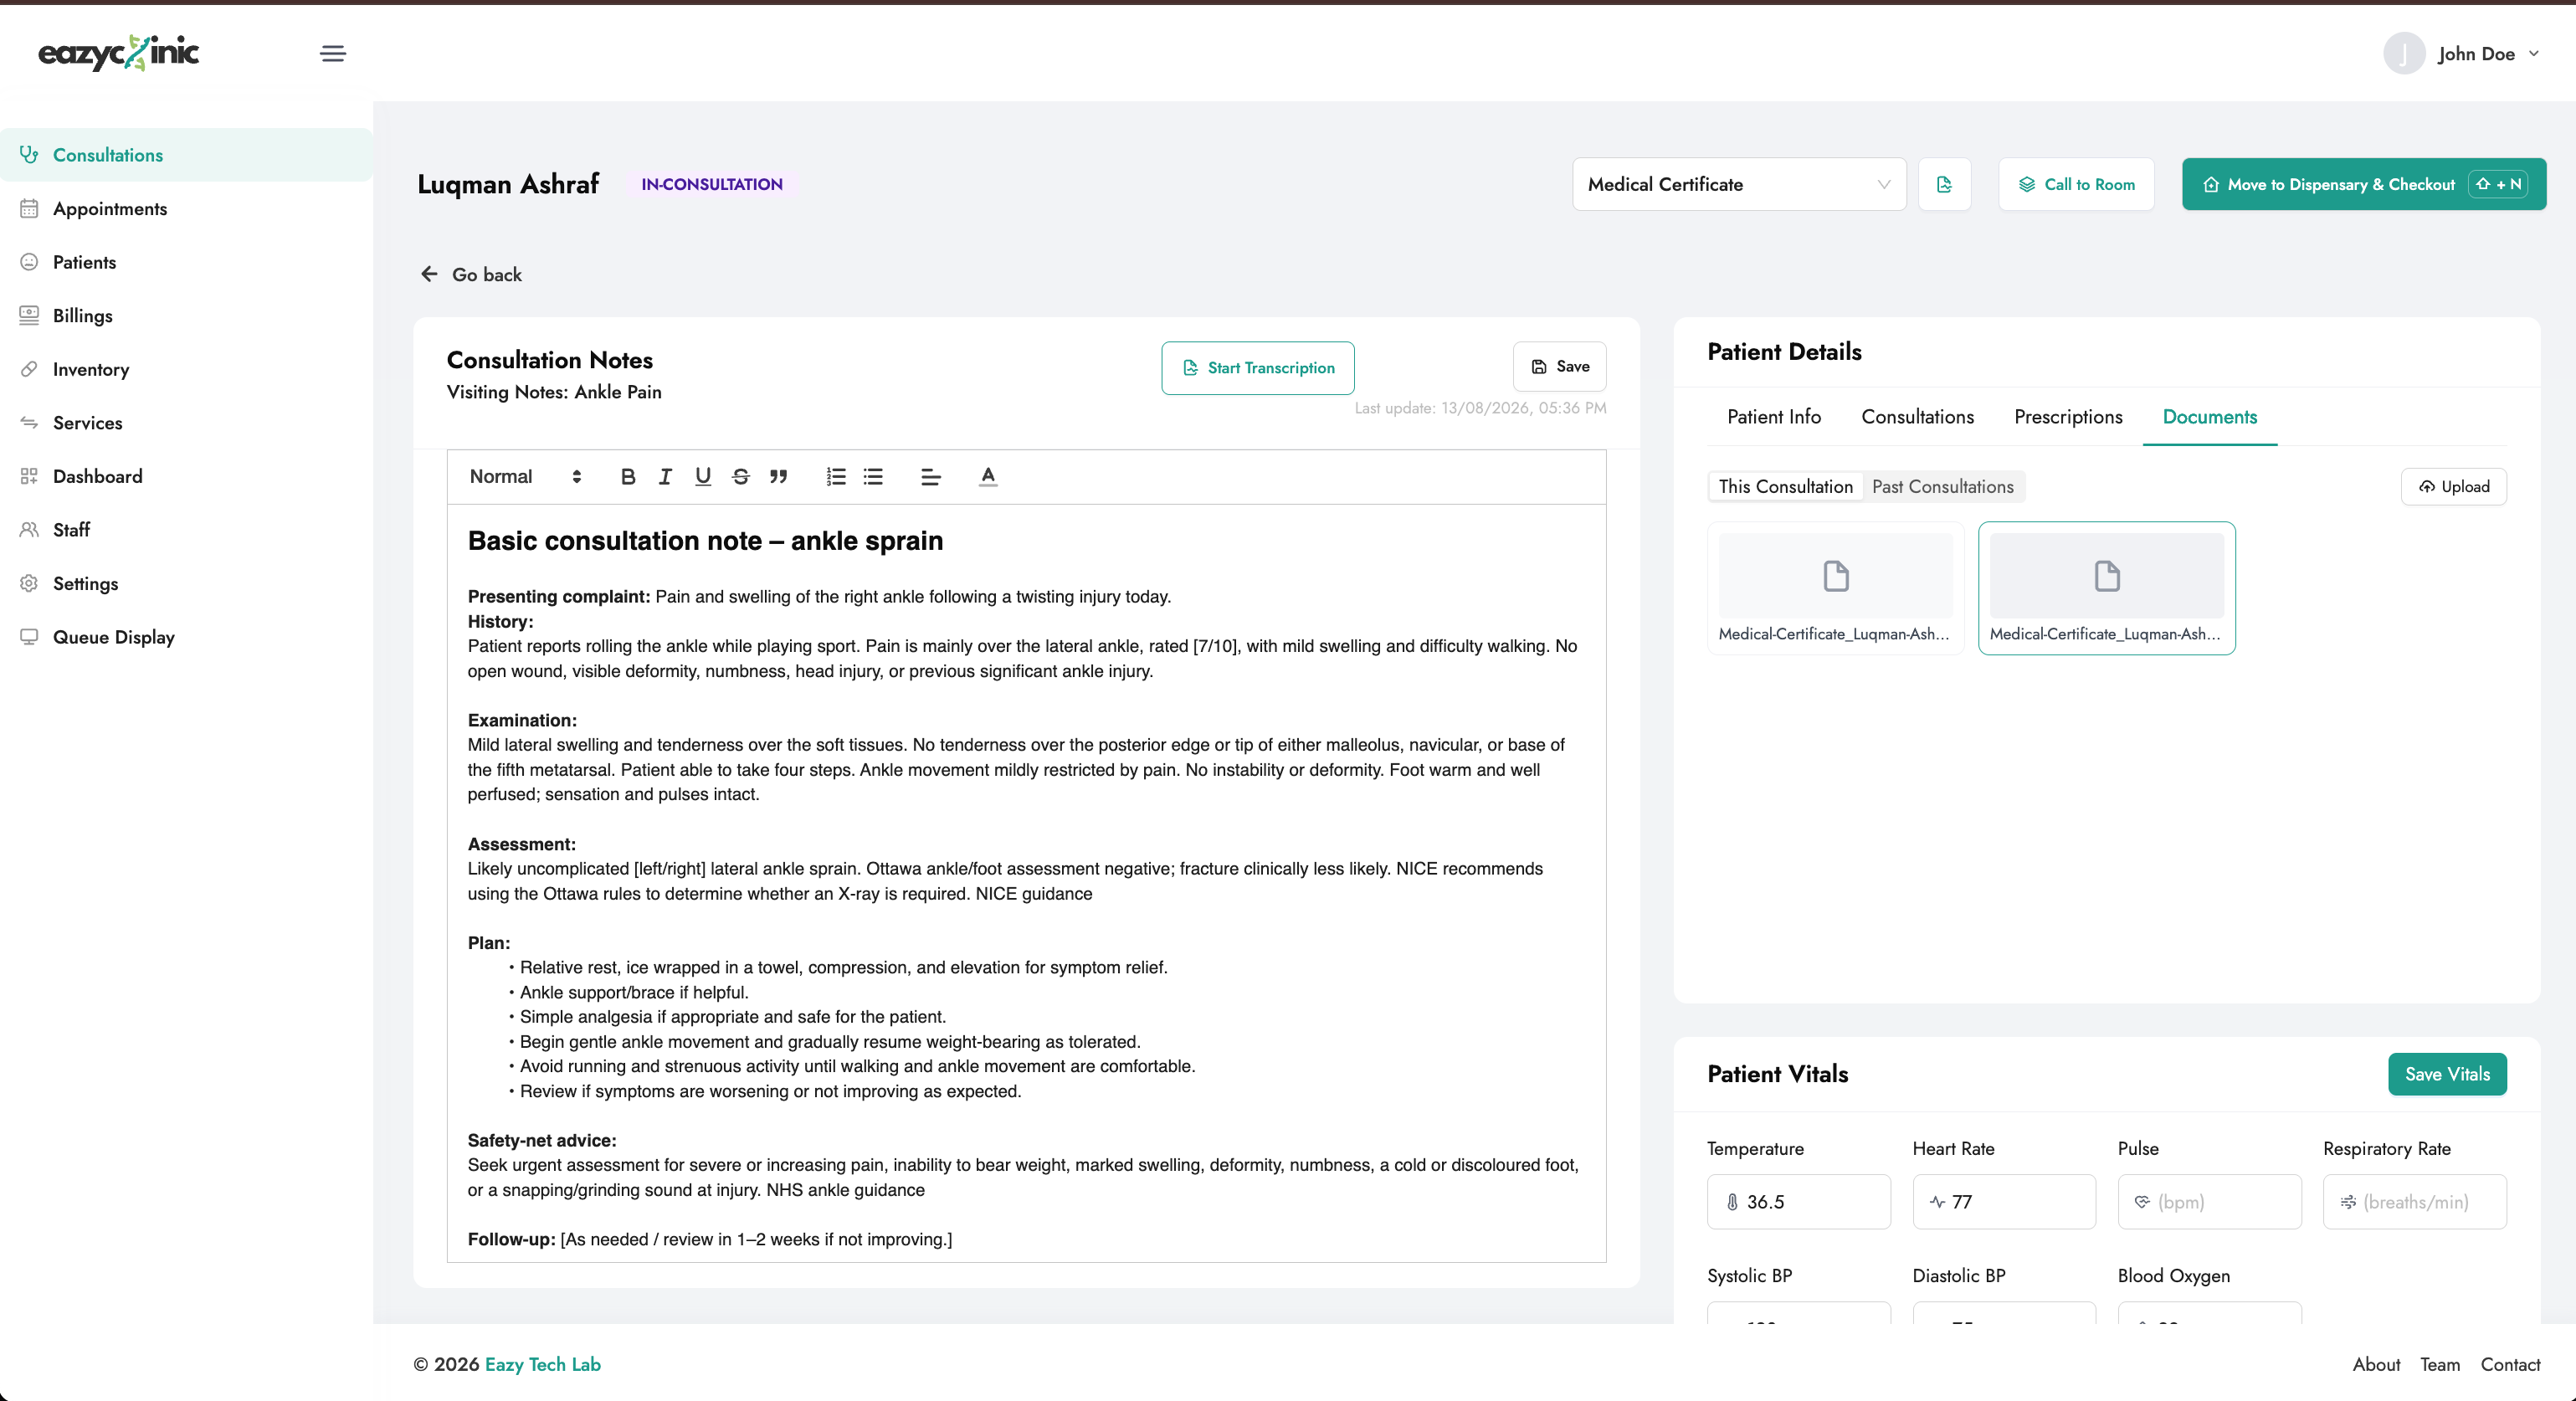
Every consultation keeps its own set of documents, shown in the Documents tab. There are two ways a document gets attached to a visit.
1. Generate one from a template. Need a medical certificate, referral letter, or other document? Pick a template and generate it — EazyClinic fills in the patient, consultation, and clinic details automatically. In the preview you can fill in any dynamic fields (such as the number of MC days or follow-up notes), then:
- Save to Consultation — attaches the finished document to this visit so it appears in the Documents tab and the patient's record.
- Open PDF — opens the document as a PDF to print or download.
You manage these templates in Settings → Document Configurator (see Settings).
2. Upload one from your device. In the Documents tab, upload an existing file — a scan, a photo, or a document you already have. This is handy for lab results, external referral letters, consent forms, or a photo of a physical document. You can:
- Upload images (JPG, PNG, or an iPhone HEIC photo), PDFs, and Word documents (DOC/DOCX).
- Capture straight from a phone or tablet camera — EazyClinic automatically compresses large images and handles iPhone HEIC photos, so uploads stay fast.
Uploaded and generated documents sit side by side in the Documents tab. The tab also has a history view so you can see documents from the patient's earlier consultations, not just the current one.
Review history
The tabs in the consultation give you context at a glance:
- Patient Info — key patient details.
- Consultations — the patient's past visits.
- Prescriptions — the patient's medication history.
- Documents — documents for this visit, both generated from templates and uploaded from your device, plus a history view of documents from past visits.
Moving to checkout
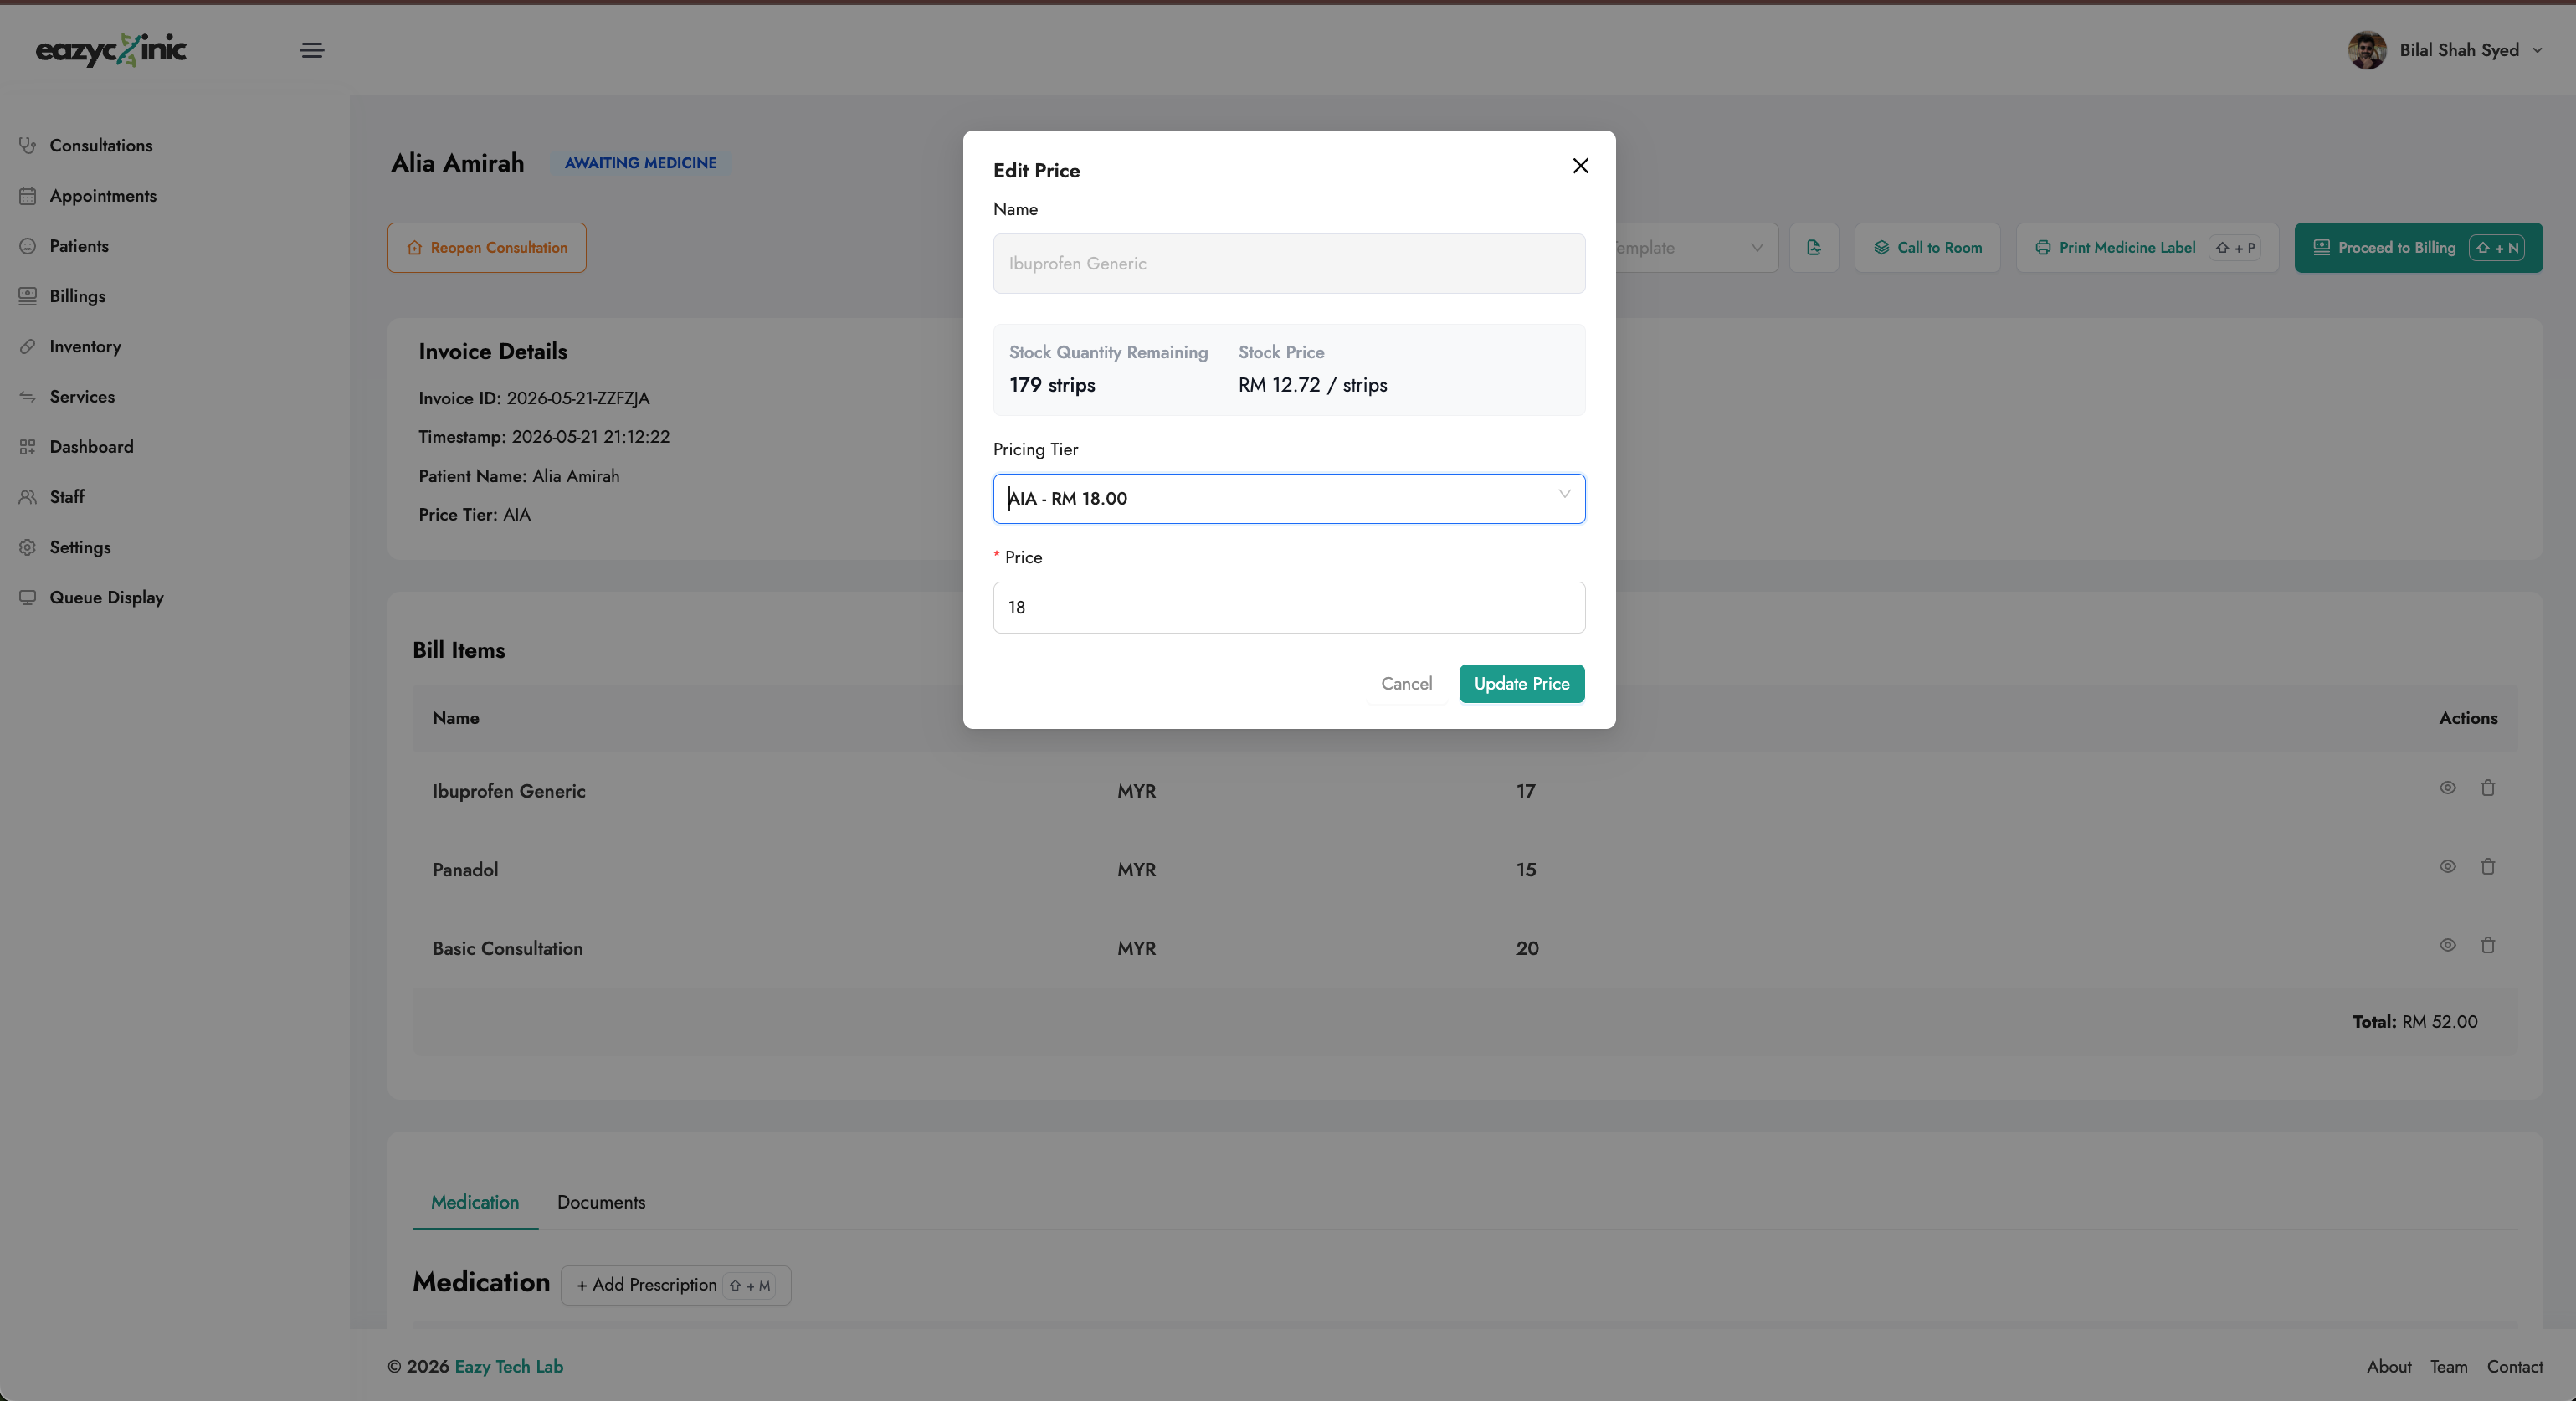
When the clinical work is done, click Move to Dispensary & Checkout. This moves the visit to Awaiting Medicine and opens the checkout screen.
On checkout you can:
- Review the bill — all prescribed medications and services, priced by the patient's price tier.
- Generate and print any remaining documents.
- Print labels for the dispensed medications.
- Take payment and create the bill. See the Billing guide.
Finishing up
From the actions menu or the consultation screen you can:
- Proceed to Billing / Go to Checkout — jump to the bill.
- Complete Consultation — mark the visit Completed. If the visit came from an appointment, that appointment is marked completed too.
- Print Label — reprint medication labels.
- View Billing — open the bill for a completed visit.
- Re-open Consultation — reopen a completed visit to make changes.
Keyboard shortcuts
EazyClinic supports shortcuts to speed up busy clinics, such as registering a patient (Ctrl/Cmd + Shift + P) and quick navigation during a visit. Hover over buttons to discover the available shortcuts.
Related guides
- Patients — registering and managing patient records.
- Queue & Display — calling patients and the waiting-room screen.
- Billing & Payments — taking payment and issuing bills.
- Inventory and Services — the items you prescribe and charge for.
![[object Object] icon](/_next/static/media/whatsapp-logo.faecda2e.svg)